Wednesday, September 5, 2012

Petite Purse Magnetic Advent calendar


As you may know already, Paperific was on the weekend at the showgrounds and here is the project I designed for our Stampin' Up! stand at the show. It was really hard to photograph but I gave it my best shot. You may remember my post on the petite purse die that I did as a product showcase for the recent Heartfelt Stampin' Up! Event. Well I took that die one step further and created this Magnetic Advent Calendar. It took ages but I am happy with how it turned out. I have used lots of new things on this project, many from the new Holiday Catalogue. Besides the Petite Purse Die, I have used the new Peekaboo Frames Die, the Snow Festival DSP, the Snow Flurry Die, Silver Glimmer Paper and heaps of punches. What worked perfectly for this was the 25 & Counting Stamp set, I just love that set so much. I had to hunt down an extra large baking tray to fit them all on :) They have a little magnet on the back to hold them on plus it makes it easy to remove them to fill them with yummy treats. I am considering running this as a class or putting together a kit so if you are interested please let me know so I can decide if its something people want.

 
I used my crop-a-dile to punch two holes in the tray and tied some of the new Natural Cotton Ribbon through them so you can hang it up.
 
Thanks for visitng today :)

Tuesday, August 28, 2012

Team training night


I recently had another team training night and after many requests we focused on the brayer. We were all very inspired by Kerry Bunting's beautiful cards at Regionals. I taught them 3 different techniques using the brayer, first one was emboss resist (that's the baby card) then we did brayered sky (sunset card) and finally brayered embossing. They all loved it and couldnt wait to get home and try out what they learned. There are a few sneak peeks here you may notics. The baby card uses a new stamp set and matching wheel called Baby Boutique. And the card in the front uses a new embossing folder called Lacy Brocade from the new Holiday Catalogue. I have also used some of the new In Colors, more about them in a minute....


We always do swaps at my training nights and here are some of the girls swaps. The first two are from Jacki.

The sail boat card comes from Jeniece and the bird from Judy.
 These two cute Christmas cards come from Jenny and Liz.

Here is is my swap. Another sneak peek too. I have used all the new In Colors here and they are just beautiful together I think. Plus I have used a new set called Papaya Collage which is just gorgeous. I have finished it off with some new stitched ribbon and the sentiment comes from Tiny Tags.
I am working on a special project at the moment for the upcoming Paperific Expo this weekend, stay tuned for pics soon.

Monday, August 6, 2012

Melbourne Regional Event

On Saturday I was thrilled to be asked to demonstrate some new products for the Stampin' Up! Melbourne Heartfelt Event. I jumped at the opportunity to showcase the gorgeous new Petite Purse Die. I designed a couple of these myself but found lots of inspiration online as I only had a week to get my display collection done.

The first pic I call my 'designer collection' LOL. When I saw the new Holiday Catalogue and the cute Halloween Designer Series Paper called Howlstooth & Scaringbone I instantly saw a Burberry inspired handbag in my mind, I ended up creating two different styles using the new Designer Ribbon Slides. The two black ones were inspired by some I found online. The top left one comes from the very talented Patty Bennett and she has a great tutorial for that one. I found the Chanel one here. For mine I used the Houndstooth embossing folder and the Silver Glimmer Paper. I used the 1/2" Circle and 3/4" Circle punches to create the logo.
This collection features the new Natural Composition Specialty Designer Series paper plus a purse done with fabric. I have used a new Naturals Designer button on the left one and an Antique Brad for the one on the right.The fabric used is the Spice Cake range. The one at the back was inspired by this one and the one on the right came from talented Frenchie, she also has a tutorial here.

These two come from Frenchie again. She does great tutorials. You can check them out here.

I love this group. The one on the left features the new Candlelight Christmas Specialty Designer Series Paper. This is the 'special' sheet inside it. It's probably a little hard to see in the pic but it's a window sheet with red flcoking - just GORJUS!!! The one at the back was inspired by talented LeeAnn Greff and she also has a great tutorial for this one here. I have used a different sheet from the same DSP pack for this one with some Real Red Carstock and embossed it with the new Lacy Brocade Embossing folder. I finished it off with some Very Vanilla Taffeta Ribbon and a new Vintage Faceted Button. The wagon on the right was inspired by this one.

Here are some cards using the die, see how versatile this die really is! The card on the left was inspired by this one. I have used the new Summer Smooches DSP and the new Large Scallop Edgelit. The one on the right was inspired by this one here. I have used the new Elegant Butterfly Punch with the framelits using the new Festive Piercing Pack. The sentiments on both are from the Itty Bitty Banners Stamp Set, it has coordinating framelits to make cutting these out super easy!.The purse in the front uses the new Delicate Designs Embossing folder.

Finally here are my fun ones. The backpack on the left was inspired by talented Mary Fish's backpack. The one in the middle features the new Comfort Cafe DSP and cute new In Color Dahlias as well as the new Fancy Fan Embossing folder. The watering can was inspired from this one where there is also a great tutorial.
See now I know you just have to have this cute die becasue there is just soooooo much you can do with it right! Well from September 1st you can order it and get creative as well with its possibilities. Call me on 0414400841 or email me at felic77@hotmail.com to place your order.

Friday, July 13, 2012

More Convention Projects...


Here is the Edgelit holder I made to keep my Adorning Accents Edgelits and matching Embossing folders in. There are many US demos that have made similar holders for their framelits and edgelits etc.. Here is the one I based mine on. I used the Beau Chateau DSP and the framelits on the front. I printed the text on my computer and then used the edgelits to cut them out. My final convention project was my album. I saw this one and used the idea to make mine but used Laura's Stack-the-deck idea to bind it. I actually made two, one of William and one of his cousin Ava. My Mum was heading off overseas and I thought they would make lovely Mother's Day presents as she sailed off 3 days later. So since she took them with her I had to make another one for Convention.


Convention Display Projects


Here are the some of the projects I put together for the Edgelit Display at Convention. I made a scrapbook page using the edgelit for a frame, a baby shower card, some gift card holders with matching envelopes and an easel calendar. These feature a sneak peek of some new DSP called Patio Party that is coming in the new catalogue beginning September 1st. I will be showing more sneak peeks over the coming weeks. I also made a mini scrapbook album as well as a holder for my edgelits and matching embossing folders. I will post pics of them tomorrow. The scrapbook page was my own idea and design but I sought inspiration for the gift card holders from here and here. The baby shower card was inspired by Mercedes Weber and the calendar was inspired by this one.

Sunday, June 24, 2012

Convention Swaps


 At this years Convention I was asked to be involved in a new feature called Product Playground. It involved putting together some samples using the new Edgelits dies and coordinating embossing folders plus working on a demonstration table showing convention attendees how to use the new dies.There were other demos showcasing other products too such as the new Simply Scored Tool and the new Framelits. It was lots of fun and I was very honoured to be selected to do so. So in keeping with my responsibilities this year I decided to make my swaps using the Edgelits. I made two designs this year. The baby one was inspired by a demo in the USA but the other was one of my own designs. For the baby card, the owl punch is used for the girls dresses and the boys pants just with a snip in the middle, the edgelit die was used for the hills and the Bordering on Romance Stamp for the clothesline. I used the pleated satin ribbon for the trim on the dresses and the buttons are from the Twitterpated suite as is the Designer Series Paper. For the living room card, I used the same edgelit for the curtain which was cut using the Mocha Morning Specialty Designer Series Papers (love these so much, gonna miss them heaps when they are retired) and the then the scallop edge edgelit for the pelmet and sheer curtain along with the striped embossing folder. The lamp was made using the round tab punch. I finished it off with an antique brad and frayed grosgrain ribbon to hold the curtain back. More on convention coming soon.....

Friday, June 22, 2012

More Birthday Fairy cards...and an apology


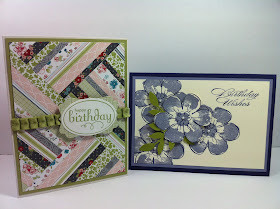
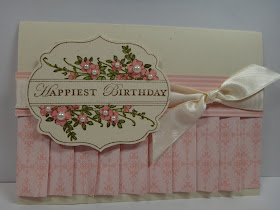
Here are my birthday cards that I sent out last month. Very similar to the previous month just a different colour combo. I really love this blossom punch and matching stamp set Mixed Bunch. I hope my recipients for May enjoyed receiving their cards.
Now for my apology.....I am very sorry I have not posted for so long. I was busy last month getting ready for Convention and not long after I got back I became quite ill and am still not 100% BUT I have lots to share over the coming weeks including convention projects plus all my secret sister projects which you are not going to want to miss so stay tuned :) Thanks for your patience.

Saturday, May 26, 2012

Baby cards again

Two of my friends recently had baby girls and of course I had to make them a card each. I just love this design, made a boy one for my friend Steph remember for her baby shower :)

Now this is the first time I have used my iPad to upload a post..... I'm using an app called blogsy it's kinda kewl but still learning so please be patient, I know you will :)


Tuesday, May 8, 2012

Stamp Club cards for April

 Last month in Stamp Club we did and old favourite technique of mine called Rock 'n' Roll. I thought the new Mixed Bunch stamp set with matching punch would be perfect for this plus I had seen a few inspirational cards out there so got to work. This is what we made. I really love how you can  make a butterfly from this punch.

Friday, May 4, 2012

Some VERY exciting news!!!!

Ok now if you have uummed and ahhhed for too long about whether to become a demonstrator, you really have no excuses anymore - why? Because now the starter kit is the most affordable it's ever been PLUS it's now fully customisable, AND there is an awesome bonus thrown in that will last every month until December!!! Want to know more? Click here for more information about joining my fabulous team of demonstrators. Also dont forget the special this month where if you buy 3 packs of designer series paper, GET ONE FREE!!! Told you there was some exciting news :) Sorry I have not posted much lately, I have been busy with my Secret Sister projects, don't worry I will be posting pics next week once she knows who I am :) Cant wait to show you everything I created.

Friday, April 20, 2012

More Birthday Fairy Cards


I have just sent out another batch of birthday fairy cards to my fello demos. Here is the card I made this month. I took inspiration from this card. I am really loving this new Mixed Bunch stamp set with the matching punch. Dont these colours look great together! They are Island Indigo and Pool Party. Am so glad we have these for another year, not quite ready to say goodbye to them just yet. I have used the new Pool Party seam binding on this card which is available in the new Autumn/Winter Mini Catalogue. Plus I have used the new Adorning Accents Edgelits for the scallop edge.
 

Thursday, April 5, 2012

Adorned Handbag

My project has been posted on Inkspirations4U today, get on over there and check out the fabulous project site, it's not too late to join for this round. I have designed a handbag using the new edgelits - totally love these :) I have also used textured baja breeze cardstock and the Attic Boutique Designer Series Paper along with some Twitterpated buttons. I decorated it with some chantilly trim, an antique brad and the Tiny Tags stamp set.

Wednesday, April 4, 2012

My little man is growing up fast


Ok, I know I said I didnt scrap much cos nothing really to scrap but since I have had William I have a million photos of course and its taken me this long to scrap just one page :) I am very time poor now you can probably imagine....Anyway here is my first scrap page for like ages. I have used the Eat Cake DSP and the pennant builder punch. He just loves having his photo taken. Stay tuned for more random layouts with my little man :)

Mini Catalogue Launch

I recently held my annual Autumn/Winter Mini Catalogue Launch and it was a great day full of fun projects, prizes, yummy food and creative time together. Here are the projects we made. I also made a gift for all my attendees but I forgot to take a photo of them - silly me :(
The first card was made using the cute new Tea Shoppe stamp set. Cant wait to play with this some more.The second card was CASED from here. The scented embossing powders are so yummo, I loved smelling them all arvo as my guests worked on their cards :)
The final project was a framelit treat holder inspired by this one I found. There is a tutorial there so you can make one too.All enjoyed a great day, am looking forward to Convention now, only 57 days to go, gees better get cracking on my swaps and projects for product playground...thanks for visiting today.

Monday, April 2, 2012

Team training night swaps

Ok I know I said I would post these the other day but time ran away from me and I got busy with preparing for my Mini Catty Launch (more on that in a later post). Anyway, here are my swaps that I made for my recent team training night. I really wanted to have a go at making these rosettes using the new Simply Scored, it really does make them sooooo easy. Plus they are in my favourite colour - PINK! I used the new Twitterpated designer series papers and matching buttons for the centre. The flower in the middle is from the triple layer bouquet punch and the rosette is mounted onto the extra large scallop circle punch. The sentiment is from the new Apothecary Art stamp set, one of my favourite from the New Autumn/Winter Mini Catalogue. Thanks for visiting today :)

Tuesday, March 27, 2012

Team Training Night

Last Friday night I had my team meeting for the launch of the New Autumn/Winter Mini Catalogue. Here are the projects we made. I demonstrated how to use the new Simply Scored and the beautiful new Framelits Labels Collection. We also used the gorgeous new stamp set Apothecary Art. I found ideas for these cards here, here and here. All have tutorials.
For the first time we decided it would be fun to make some swaps and start getting in the spirit for Convention coming up in May. I was really impressed with all the swaps that the girls put together.
Here is Denise's Swap - another card using the framelits and the Simply Scored.
Here is Judy's Swap - using the cute Tea Shoppe Stamp set.
Here is Jenny's Swap - an awesome punch art card, great for masculine cards.
Here is Liz's Swap - another one using the framelits and Apothecary Art stamp set.
And here is Jeniece's Swap - cute little 3D folded dresses, great for parties.
I will come back tomorrow and post pictures of my swaps :)
If you are interested in joining my fabulous team, simply email me for a free information pack to be sent to you. It's not too late to make the most of all the bonuses of joining during Sale-a-bration, call me today.

Saturday, March 17, 2012

I'm Gorgeous!!! (Apparently LOL)


The lovely Tanya Bell nominated me, yes ME and my blog for a gorgeous blogger award. WOW, what an honour. Thank you soooooooo much. I dont know that I am quite in her league but I am blushing all the same.
As with most blog awards there are a couple of things I need to do …
* Thank the person who gave you this award (Thank you, thank you, thank you Tanya)
* Paste the award to your blog (tick)
* Link the person who nominated you for this award (tick)
* Nominate as many other bloggers for this wonderful award as you like (tick)
* Post links to their blogs (tick)
So here is what I came up with....
Jo Eades
Chris McLucas
Andrea Buckland
Andrea Lowcock

I hope they like their new awards :)

Birthday Fairy Card

Earlier in the year I signed up for a birthday fairy round for the year where every month you send birthday cards to the people celebrating their birthdays. When its your birthday everyone sends one to you. It is organised through the ESAD group I belong to for demos. Here is the card I made approx. dozen of for my recipients for Jan & Feb.
Here is the collection of cards I received for my birthday early last month. What a great collection. I will continue to post my cards that I make throughout the year for the birthday gals.